|
SKETCH NAME |
DESCRIPTION & LEARNINGS |
SOURCE LINKS |
SUPPLEMENTAL INFO |
|
Arduino Pro Mini
|
Let's get ready to use the Nokia 5110 graphic display with a 3.3v based
device, the
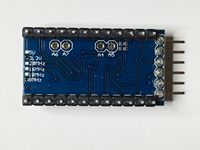
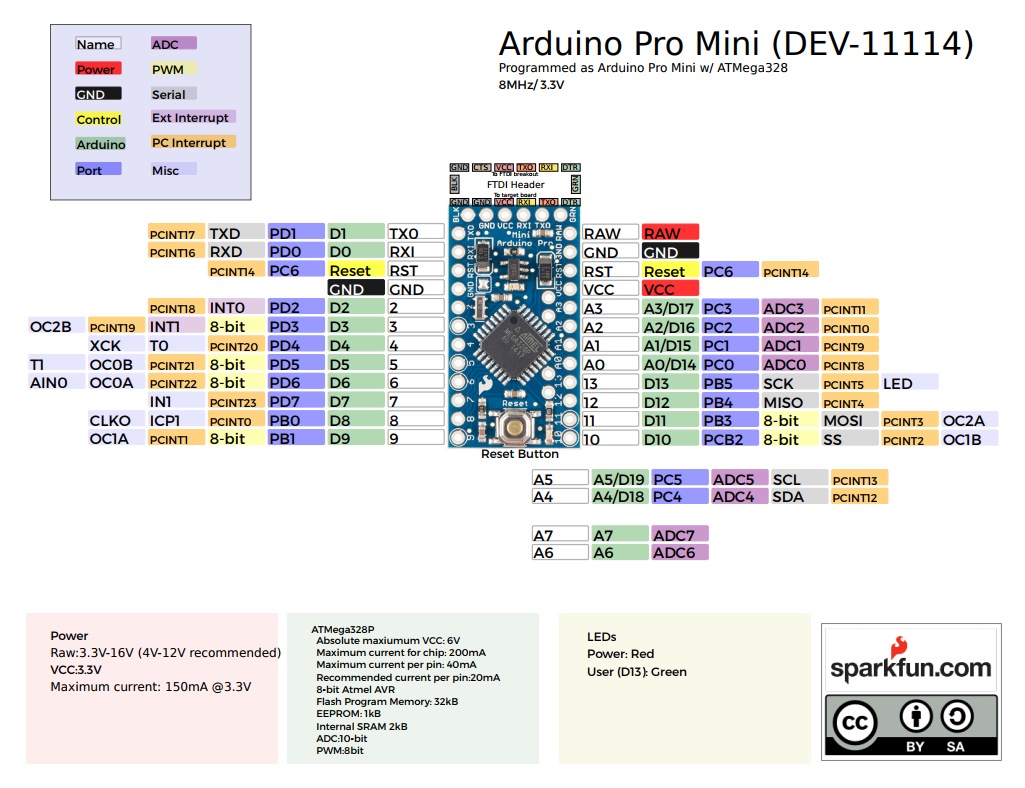
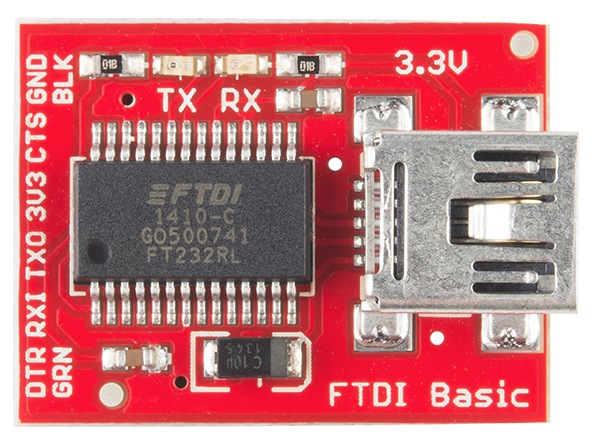
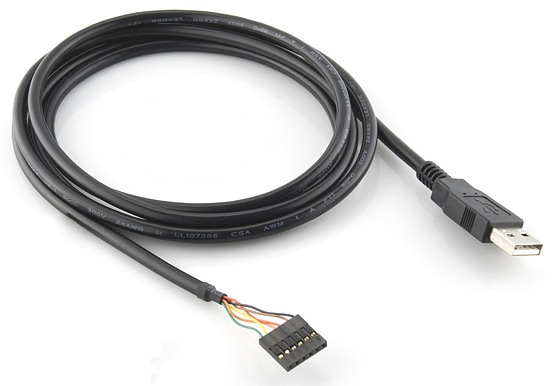
Arduino Pro Mini. Although the Pro Mini is almost feature identical to the UNO, it does not contain a USB connector because there is no space-consuming serial chip. You will need either an FTDI cable (USB to Serial) or a small FTDI Basic Breakout board that supports auto-reset to upload your sketches in the usual way from your Arduino IDE. Note that these devices/cables are available in 3.3v and 5v so you'll need to get the right one for your microcontroller board. Some of the offshore clones are available in either voltage. Pin layout is slightly different on the Pro Mini compared to the UNO.
|
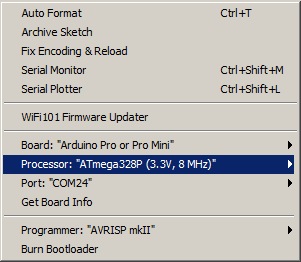
Arduino.cc Arduino Pro Mini 3.3v/8MHz Adafruit.com Arduino Pro Mini 3.3v/8MHz Sparkfun.com Arduino Pro Mini 3.3v/8MHz Banggood.com Arduino Pro Mini 3.3v/8MHz w/ angled FTDI Within the Arduino IDE, it's important to select the correct board and voltage level for the Pro Mini. In the screenshot below, you can see we've chosen the 3.3v/8MHz version. A different board usually requires a port change, too; we've selected COM24. Arduino IDE | Tools | Board
|
FTDI Basic Breakout board
FTDI Cable
|
|
Nokia 5110 Graphics Display Adafruit PCD8544 Nokia LCD Library
|
Unzip both libraries, remove the 'Library-Master' component of the
folder name, then drop them both into '..\My
Documents\Arduino\libraries'.
The Adafruit_GFX library always works together with a second library provided for each specific display type. The PCD8544 library will drive the video controller to which the Nokia is attached. The Adafruit GFX Graphics core library can print text, bitmaps, pixels, rectangles, circles and lines.
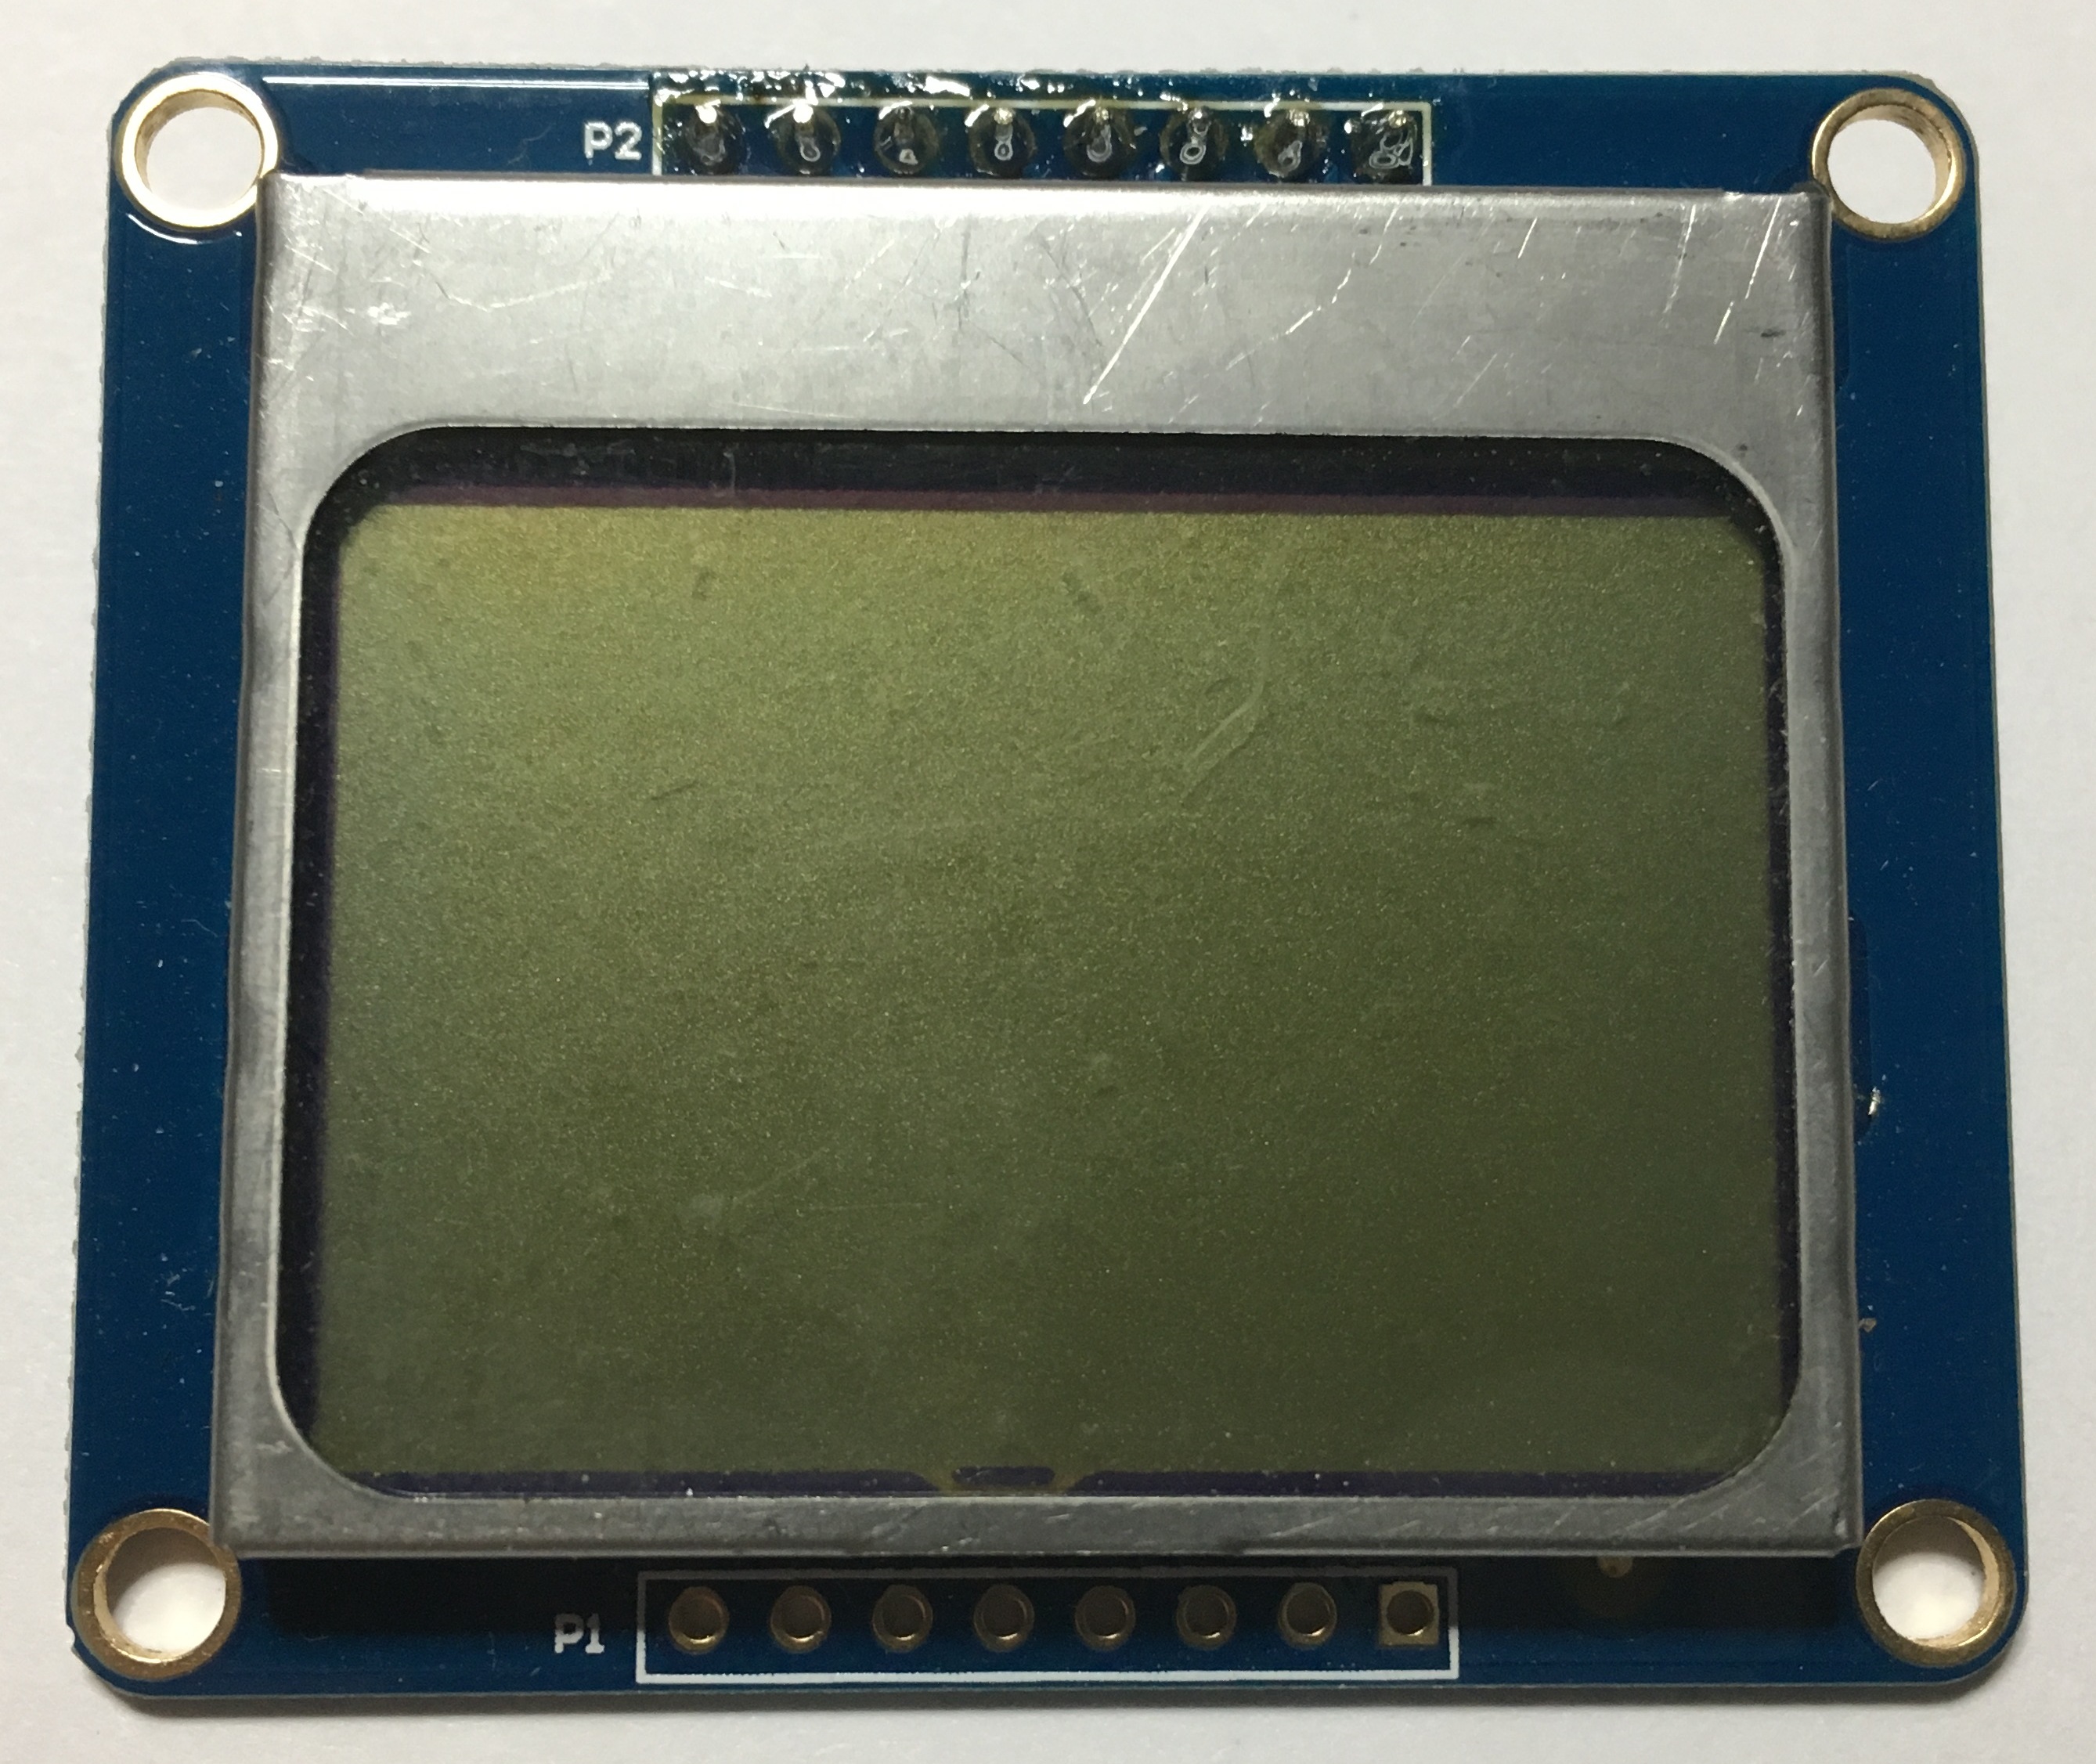
Nokia pixel mapping is 84h x 48w. Text characters use a 8h x 5w pixel format in an 8x6 cell (blank vertical pixel column between characters. As such, the maximum character count is 16 characters (84/6) wide, and 6 rows (48/8) high. Example: the letter 'A'. {0x7e, 0x11, 0x11, 0x11, 0x7e}
|
Adafruit.com Nokia 5110 graphics display Sparkfun.com Nokia 5110 graphics display Banggood.com Nokia 5110 graphics display Nokia 5110 datasheet. Graphics coordinate system and units.
Graphic Primitives: Drawing pixels, bitmaps, lines, rectangles, circles, rounded rectangles, triangles, characters and text.
Using Fonts.
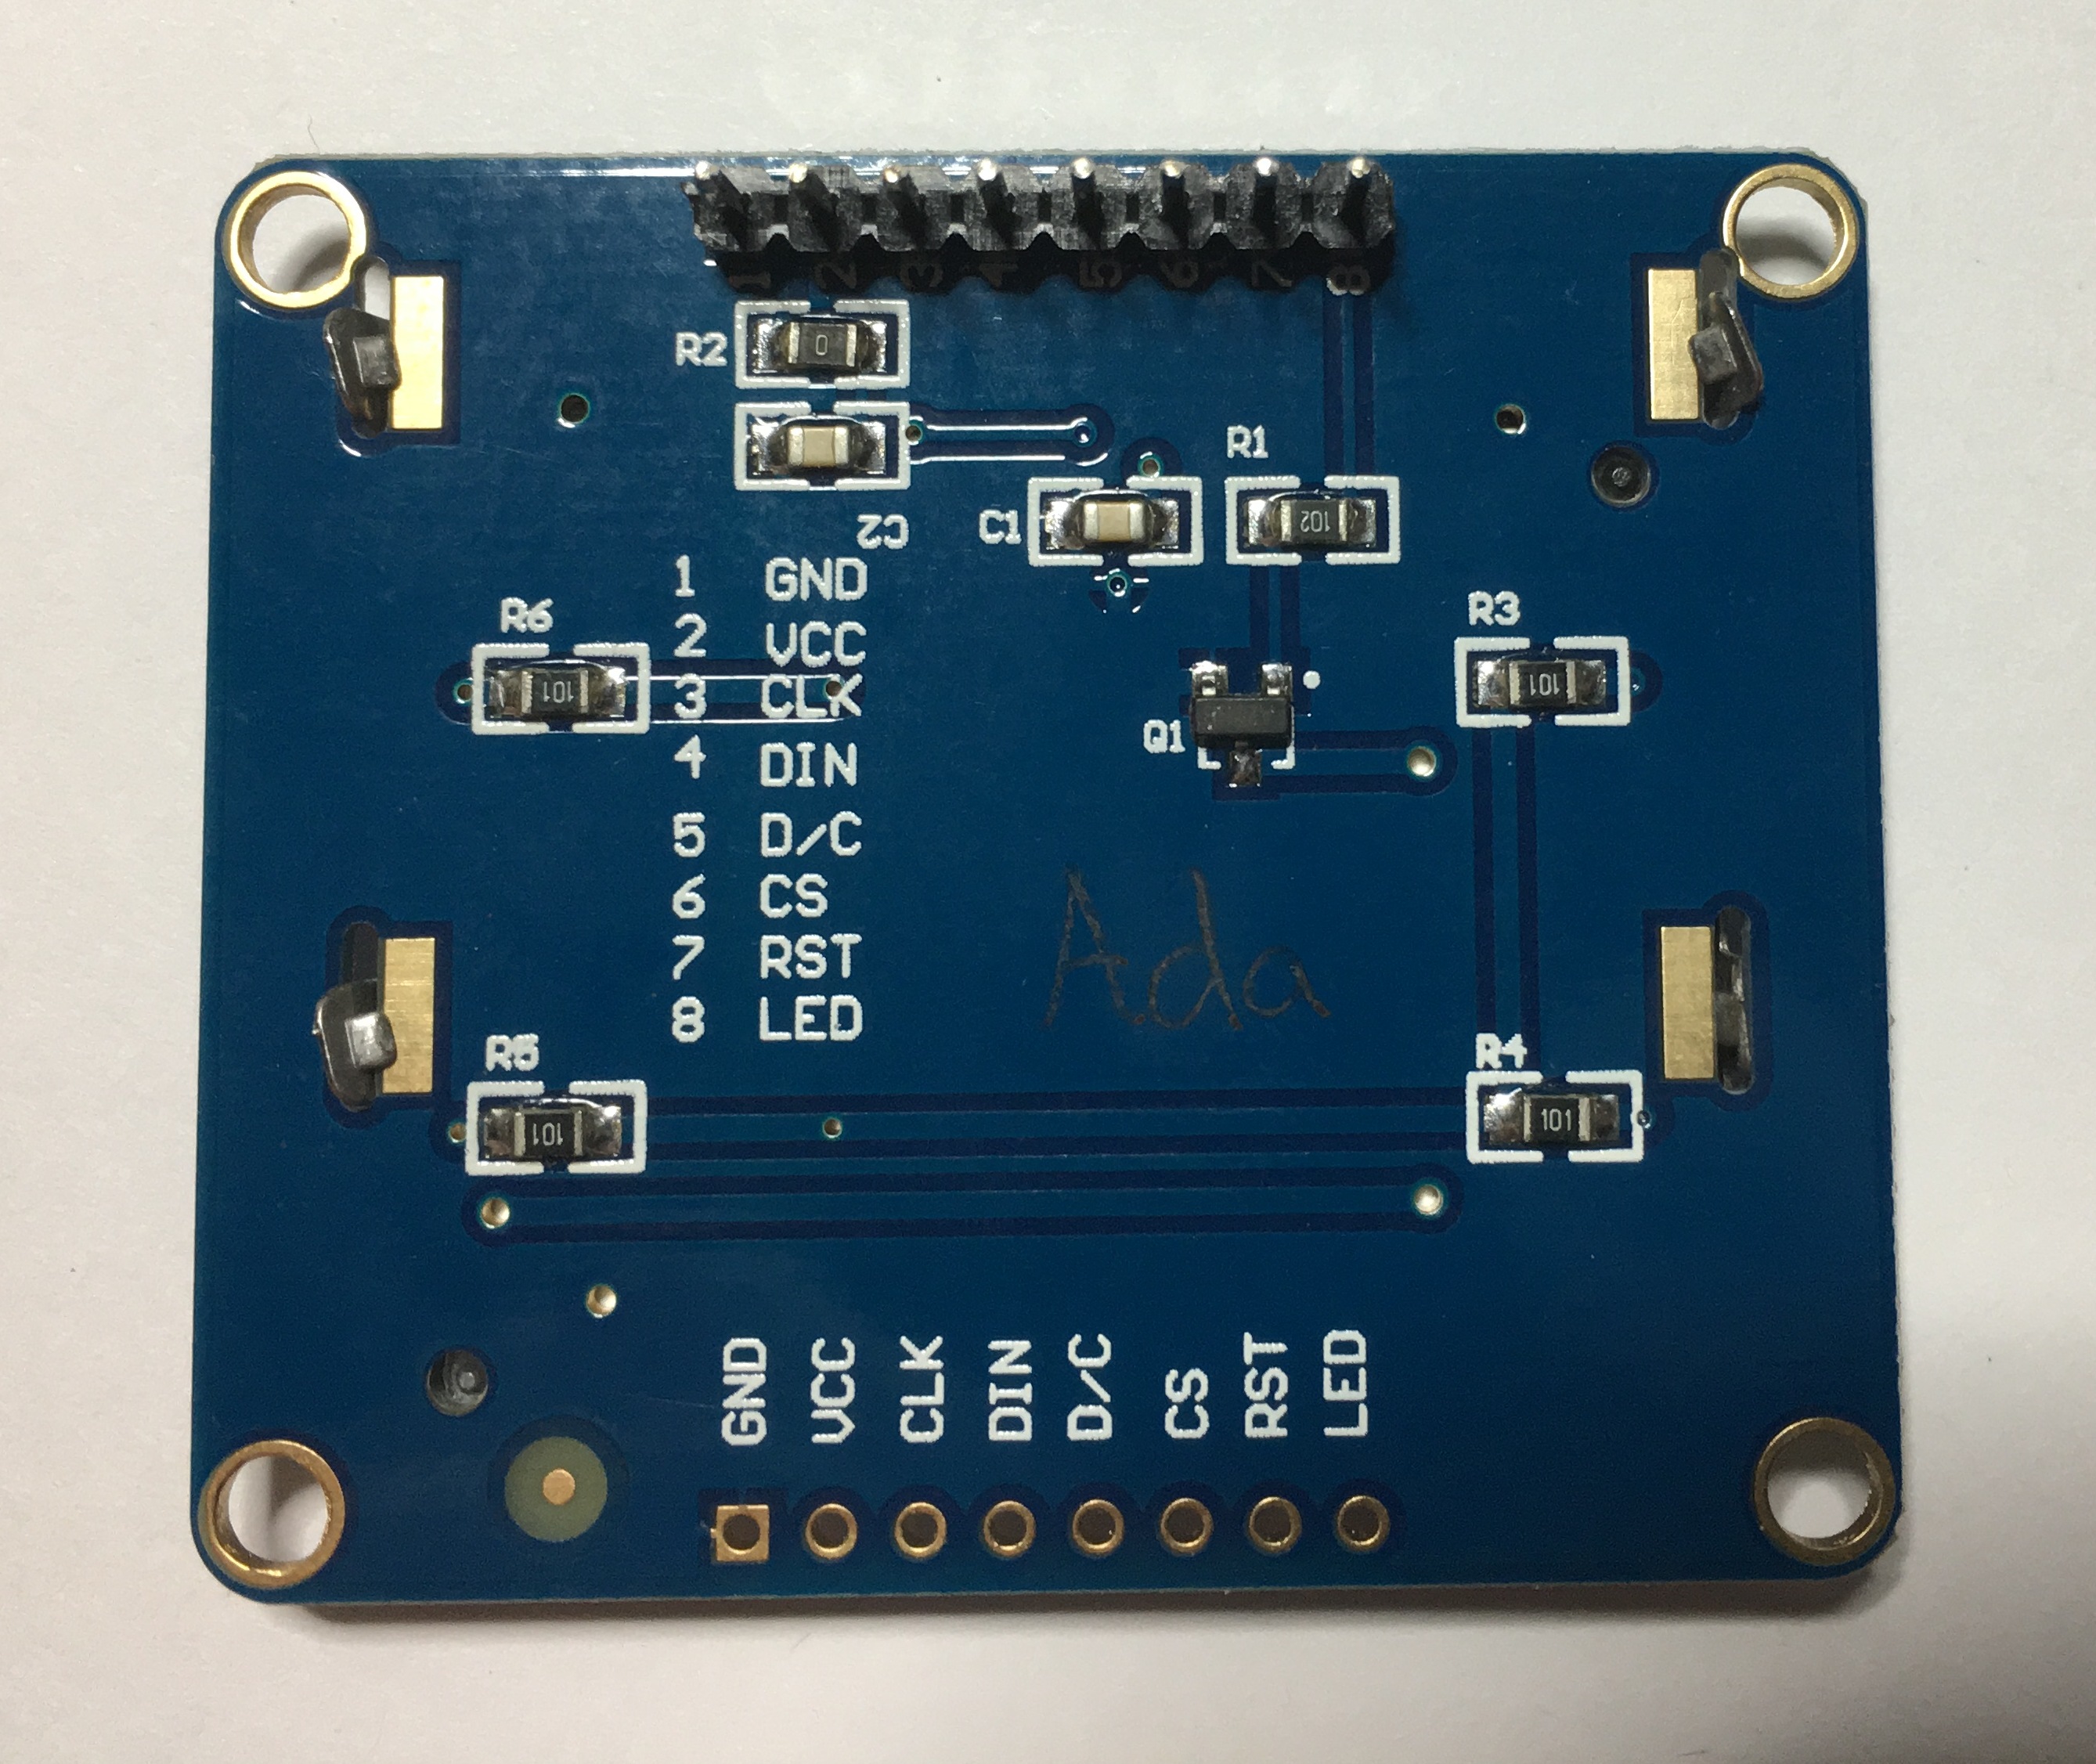
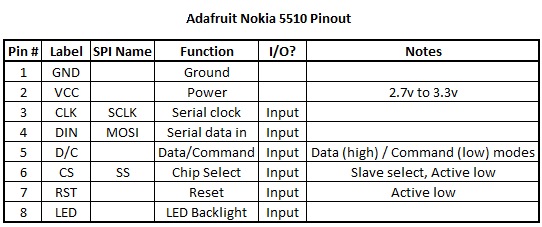
Adafruit Nokia 5100 Pinout
|
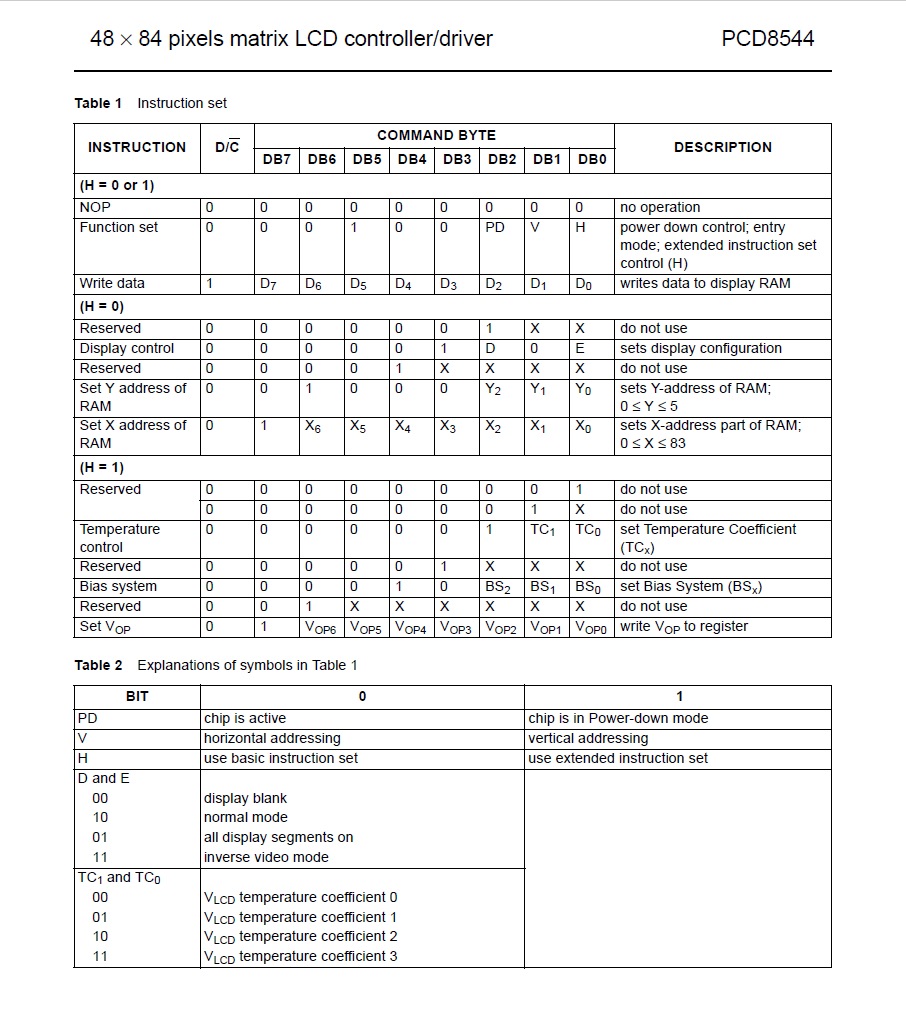
PCD8544
Glyph Editor
The PCD8544 Glyph Editor can be used to create your own custom characters. Note that the bytes are in hexadecimal format, and are only 5 in count because the vertical columns are used to create the hex; the least significant bit is at the top left for the first of 5 columns. |
|
Nokia5110_Pro-Mini.ino
|
You should review Julian Ilett's Youtube video before wiring up
the Nokia 5110 graphics LCD display to your Arduino and running any
sketches:
Arduino Nokia 5110 LCD Tutorial #1 - Connecting
and Initial Programming. NOTE: Julian indicates the Nokia 5110 can handle 5v but it really can't as he finds out in a later video. Within some undetermined time, the Nokia will fail; the device was designed for 3.3v phones, not 5v TTL logic. I am using the 3.3v version of Arduino Pro Mini, as you can see at the top left of this page; click on the image for a larger version. You will need to have the Nokia 5110 datasheet handy, specifically page 14 for Julian's video. If your project requires small flash storage space and SRAM, then writing to the Nokia 5510 PCD8544 controller directly with the commands laid out in the sketch is your best choice - no library is needed. Here are the results with my Arduino Pro Mini: Flash RAM 1124/30720, SRAM 9/2048, EEPROM 0/1024. |
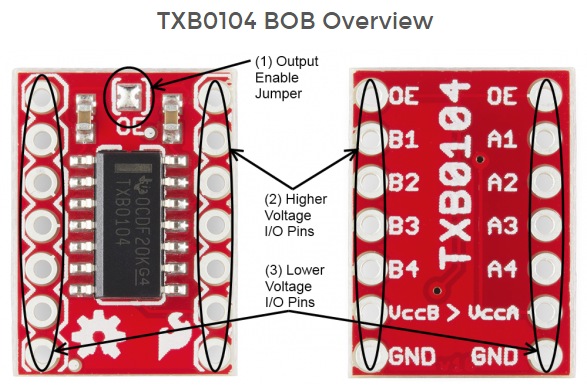
If you don't have a 3.3v Arduino uC (microcontroller), then you can use resistors to drop some of the voltage from your 5v Arduino before it reaches the Nokia 5110. A safer alternative would be to use a level shifter or converter for each logic pin. Here are a few choices: Adafruit: level shifter and hookup directions. Sparkfun: level shifter and hookup directions. Banggood: level shifter.
|
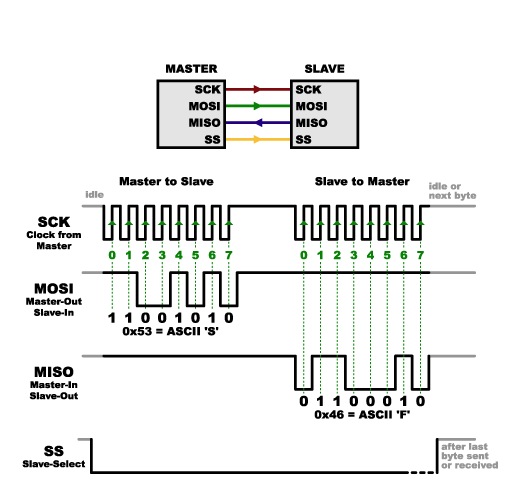
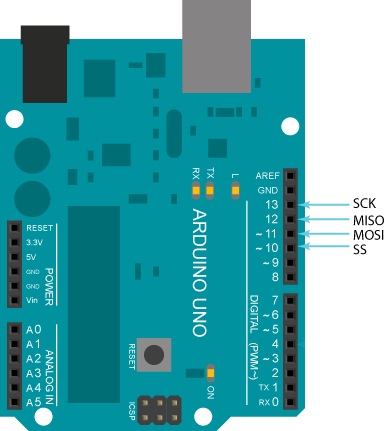
In the sketch, the pins used for hardware SPI are specified. Whenever possible, use hardware SPI (specific pins) instead of software SPI (pin choice flexibility) because it's faster. This is important for displays and SD cards.
|
|
Nokia5110_Hello_World.ino
|
Ensure the 'font.h' file is in the same folder as the sketch,
'Nokia5110_Hello_World.ino'. Review Julian Ilett's second Nokia Youtube video prior to running this sketch. The library, 'font.h', contains the ASCII set from 0x20 to 0x7F; the control characters from 0x00 to 0x1F are not displayable. The sketch is heavily commented to help in understanding what is being done. |
lcdWriteCmd(byte cmd): send a command. lcdWriteData(byte dat): send data. lcdXY(int x, int y): position the cursor. lcdWriteCharacter(char character): display a character. lcdWriteString(char *characters): display char string. clearLCD(): clear the screen. asciiSet(): display the ASCII character set.
|
SPI: get into the habit of using hardware SPI (13,12,11,10)whenever possible.
Another resource site. |
|
Nokia5110_LiveData.ino
|
This
sketch
is similar to the one above except it is used to measure
voltage on Arduino pin A0 (or any pin; just change line 49). The end
terminals of a potentiometer are attached to ground and VCC. The pot's
middle wiper is attached to pin A0 which is a PWM analog input that can
read milli-graduations. To use the code on a 5v Arduino, just change
sketch line 49 so it reads '5' instead of '3.3'. Don't forget to place the file 'font.h' in the same folder as the sketch. Alternatively, you could add it to the sketch. |
lcdWriteString(dtostrf(voltage,4,1,measure)): 'dtostrf()' is a 'double to string' function, a part of stdlib.h. Format: (source variable, placeholder count, decimal precision, destination string). You will need to declare an array like 'measure[8]' to hold the destination string. The function will take a float like 'voltage' which could contain the value '3.30', display it as a 4 placeholder (including the decimal point) with 1 digit of precision, as a string named 'measure' , i.e., '3.3'. |
|
|
|
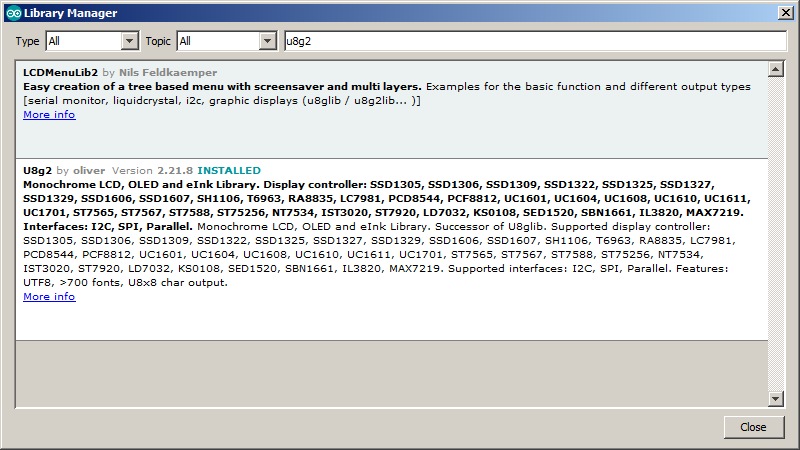
U8glib library has been
replaced by
U8g2 library for monochrome displays.
Rename 'u8g2-master' to 'u8g2' and drop the folder into '..\My Documents\Arduino\libraries'. This will install drivers for many platforms that may cause your IDE to complain about 'invalid libraries'. Alternatively, you can navigate to 'https://github.com/olikraus/u8g2/wiki/u8g2install' and follow the directions exactly as written. This will only install libraries and sketches for your Arduino environment. Next, follow the directions at 'https://github.com/olikraus/u8g2/wiki/setup_tutorial' under 'How to connect a display to U8g2 Library'. Read the entire 'setup_tutorial'. It is highly likely you will be using a Nokia5110 with the 'PCD8544 84x48' driver. The final result can be found in either of the two sketches on the left. They have been configured for 1) text mode (small footprint) as Nokia5110_U8X8_Text.ino, or 2) text and graphics mode (larger footprint) as Nokia5110_U8G2.ino
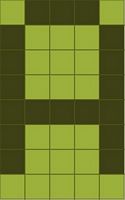
The lower .gif animation on the left is from the sketch, Nokia5110_U8G2_DrawRect.ino |
Character mode U8X8 fonts. These consume the smallest memory footprint.
Graphics mode U8G2 fonts. These consume much more memory than the text-only mode.
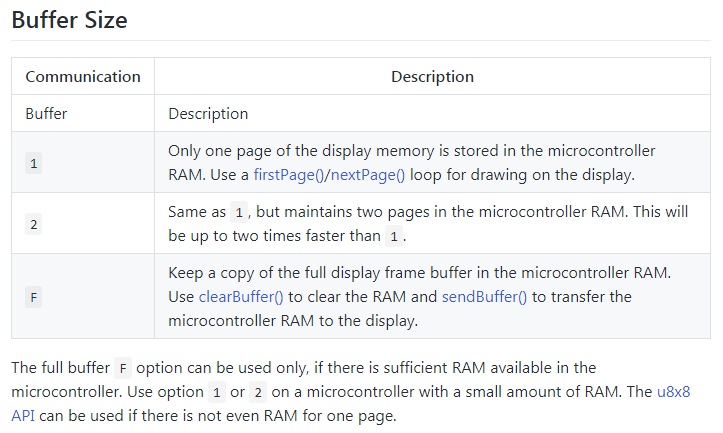
U8X8 reference: no graphics commands. U8G2 reference: many graphics commands. If RAM is an issue with your microcontroller (e.g. ATtiny85), use the chart below to choose the mode that uses the least RAM yet is still fast.
|

