![]()
|
Nano Neo Strands
|
||
|
Pix/Vids/Schematics (click to enlarge) |
Info |
|
|
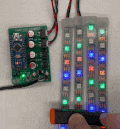
Short Video of v1.0 Operation
PCBs are out for manufacture
|
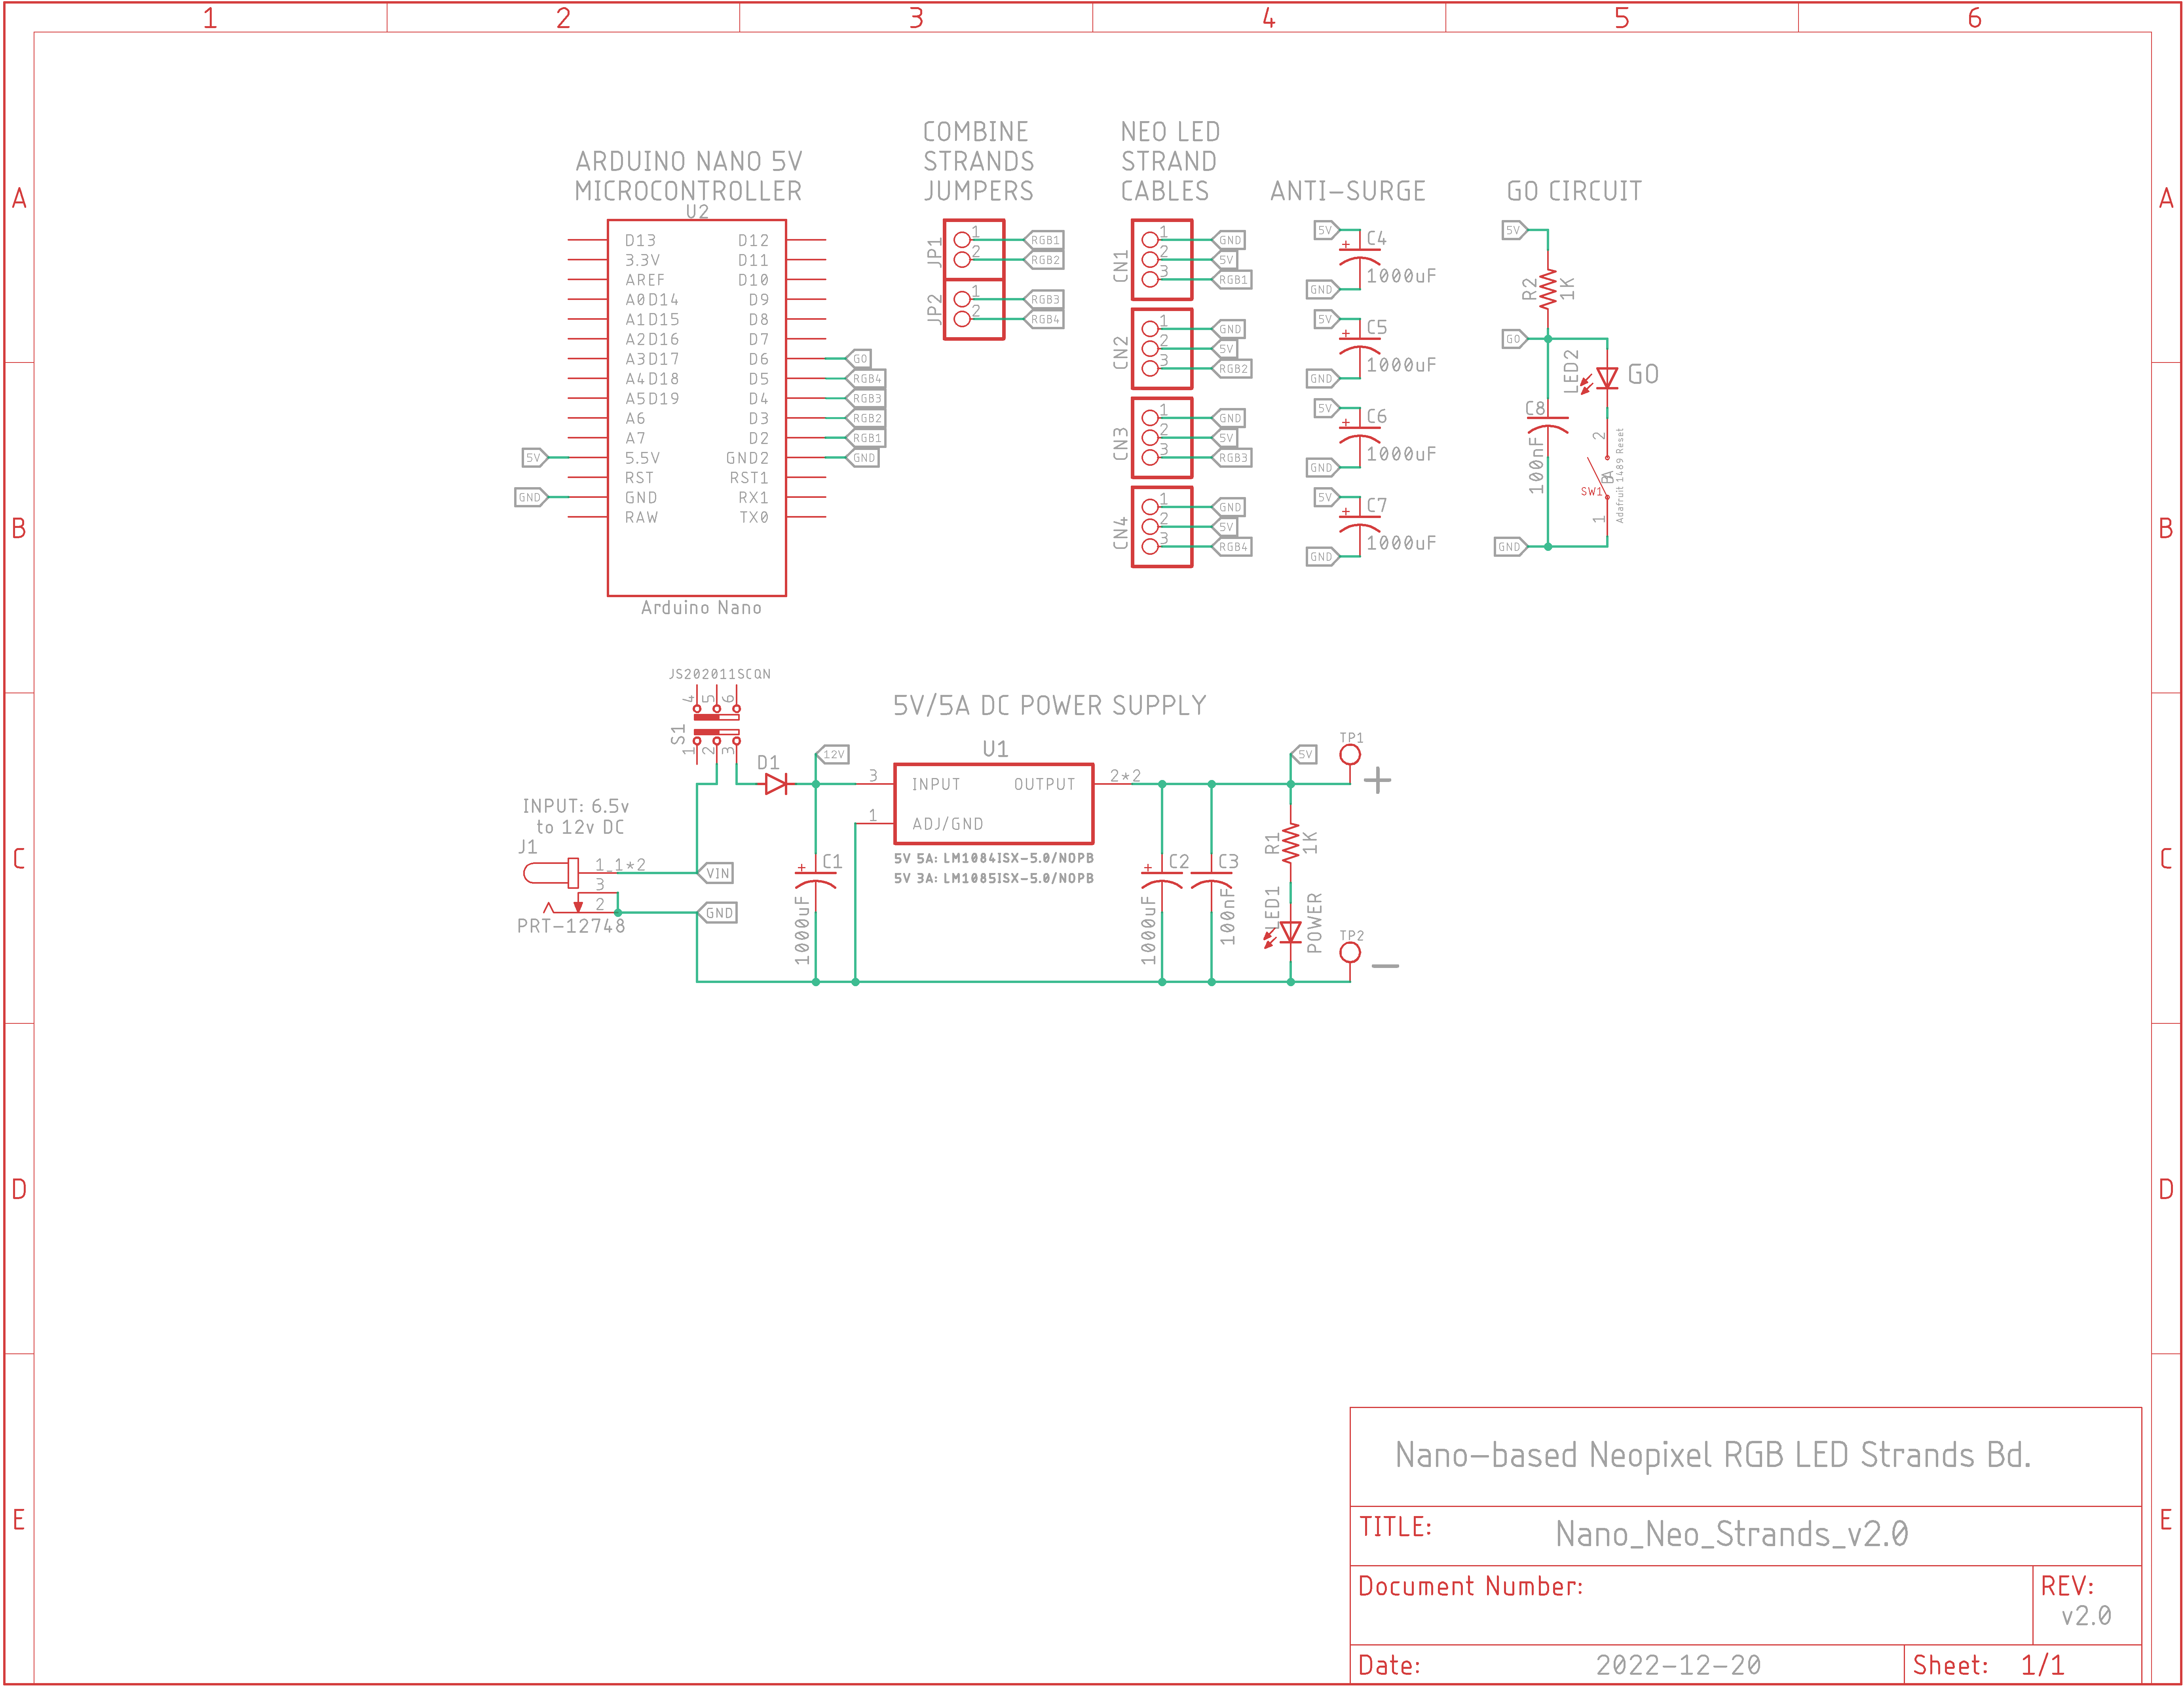
Eagle CAD: v2.0 Schematic
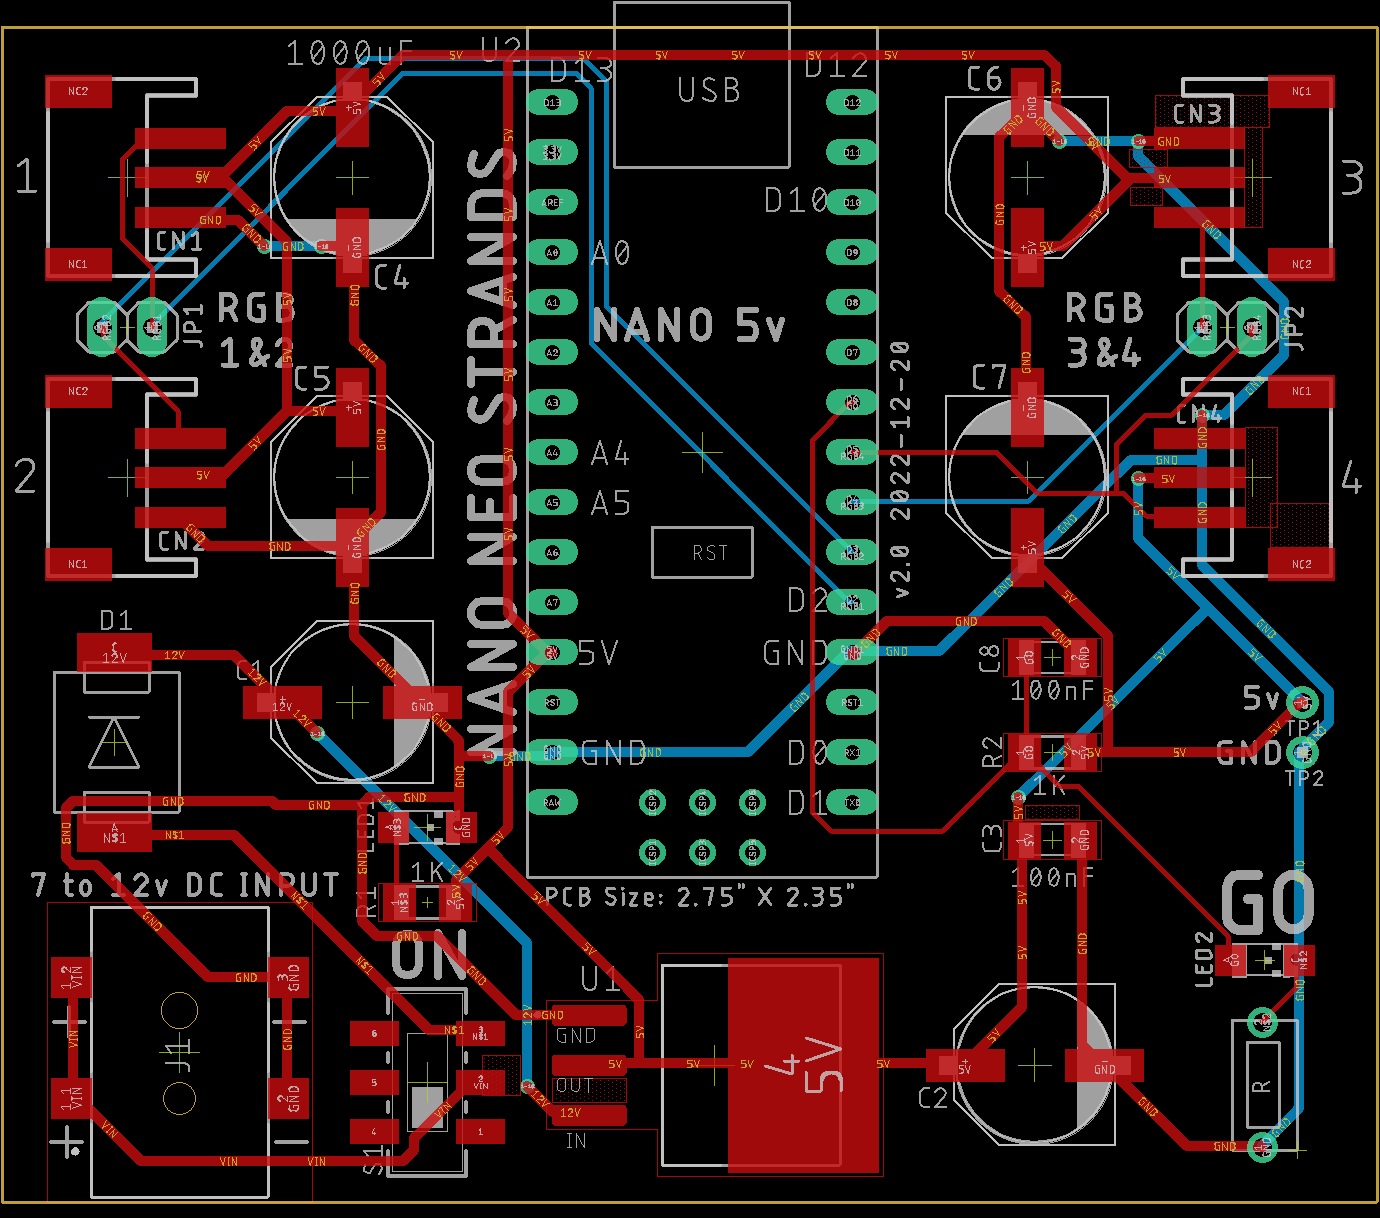
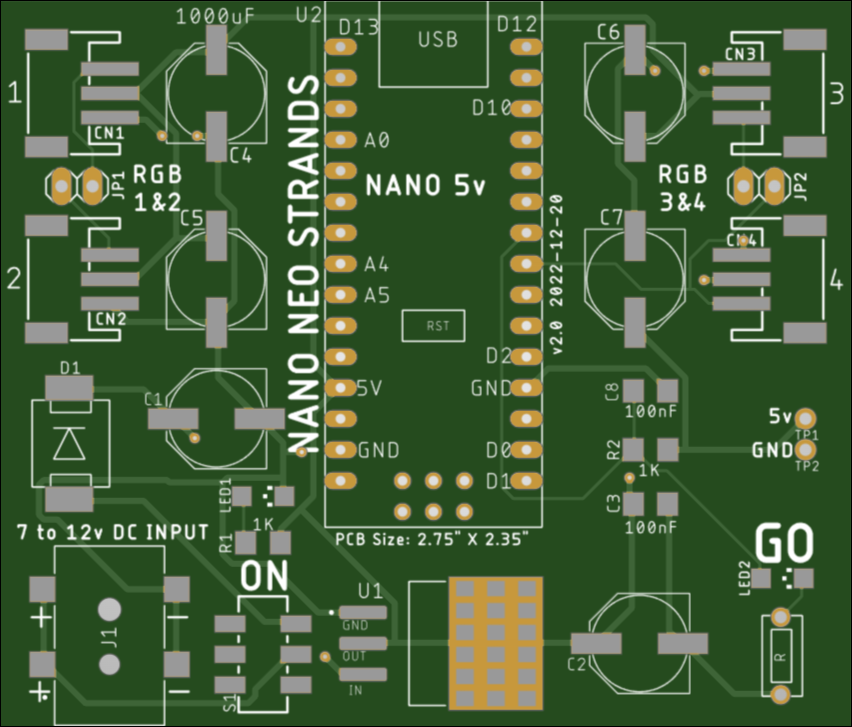
Eagle CAD: v2.0 Board Layout
PCB v2.0
Eagle CAD: BoM (Bill of Materials)
|
Description: Arduino Nano-based board that is used to drive up to 4 strands of Neopixel RGB LEDs. Each strand of LEDs can be driven separately, or strands are combined as 1&2 and 3&4. Pressing the GO button will cycle you through a number of display patterns.
v2.0 Changes: - DC power jack replaced the screw terminal connector. - 5v/1A voltage regulator replaced with 5 Amp model, the protection diode was up-sized, too
Features: - Supports 12v DC power supply from car or motorcycle - Diode protection on the DC input - On/Off switch, Power-On LED - GO button LED flashes each time the GO button is pressed to change the display pattern
Power Input: I changed the v1.0 screw terminal connector to a female DC power jack that support this adaptor. With it you can use your bench 5v power supply with wire leads to connect to the project module. The 12v DC from car or motorcycle will adequately power the module if you wish to adorn your ride with the Nano Neo Strands module and LED strands.
Notes: 1) Most microcontroller onboard voltage controllers should not be used to power RGB LED strips. The microcontroller's USB connector is just for powering itself during programming/reflashing and not for driving the power hungry RGBs. 2) At maximum brightness each RGB LED can draw 60mA of current. Multiply that by 30 LEDs and 2 strands and you're looking at 3.6A at 5v or 7.2A if you connect all 4 strands. As you may have guessed you will want to run them at a lower brightness level like 20%. Most car and motorcycle fuses are a minimum of 10A at 12v so they will probably not be a concern but your 'wall-wort' charger will be though. It may be best to go with something like this one that can handle higher current loads.
Arduino C/C++ Code: I am writing some code in C that will execute each time the GO button is pressed. For now you can test two strands of Neopixels with the Adafruit code, RGBWstrandtest.ino
Video: In the video I have "horseshoed" the two 30-LED strands so you can see the patterns start and finish.
|
Updated 2022-12-22 @ 8am
![]()