![]()
| Project 23: QT PY & Tiny OLED Display | ||
|
Pix/Vids/Schematics (click to enlarge) |
Info | |
|
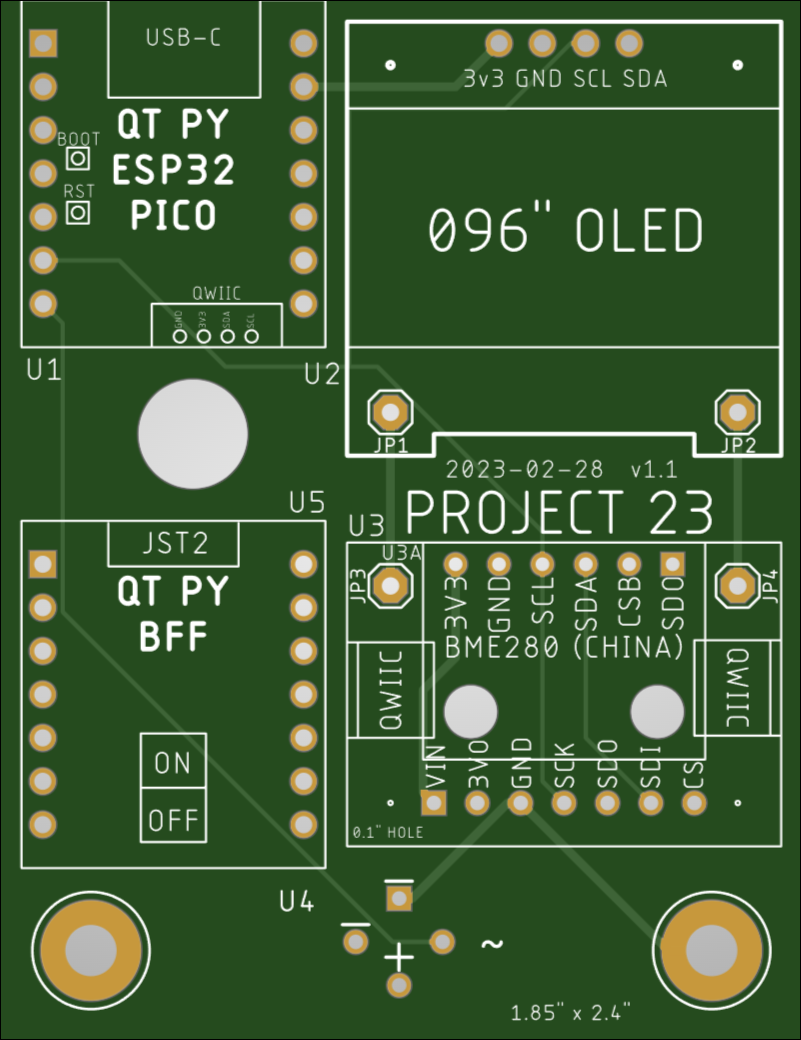
PCB: LED v1.1 Board (Top)
Short Demo Video: (click to enlarge)
Note 1: The PIR motion sensor is backordered so I waved a finger near the 4-pin insertion at the bottom of the PCB. This "faked" the code into thinking the PIR sensed movement.
(The display's scrolling effect is from the
phone camera.) I use Soft RTC that is backed up with the LiPo battery. If the battery becomes disconnected, you'll need to run the code again to set the current compile time. |
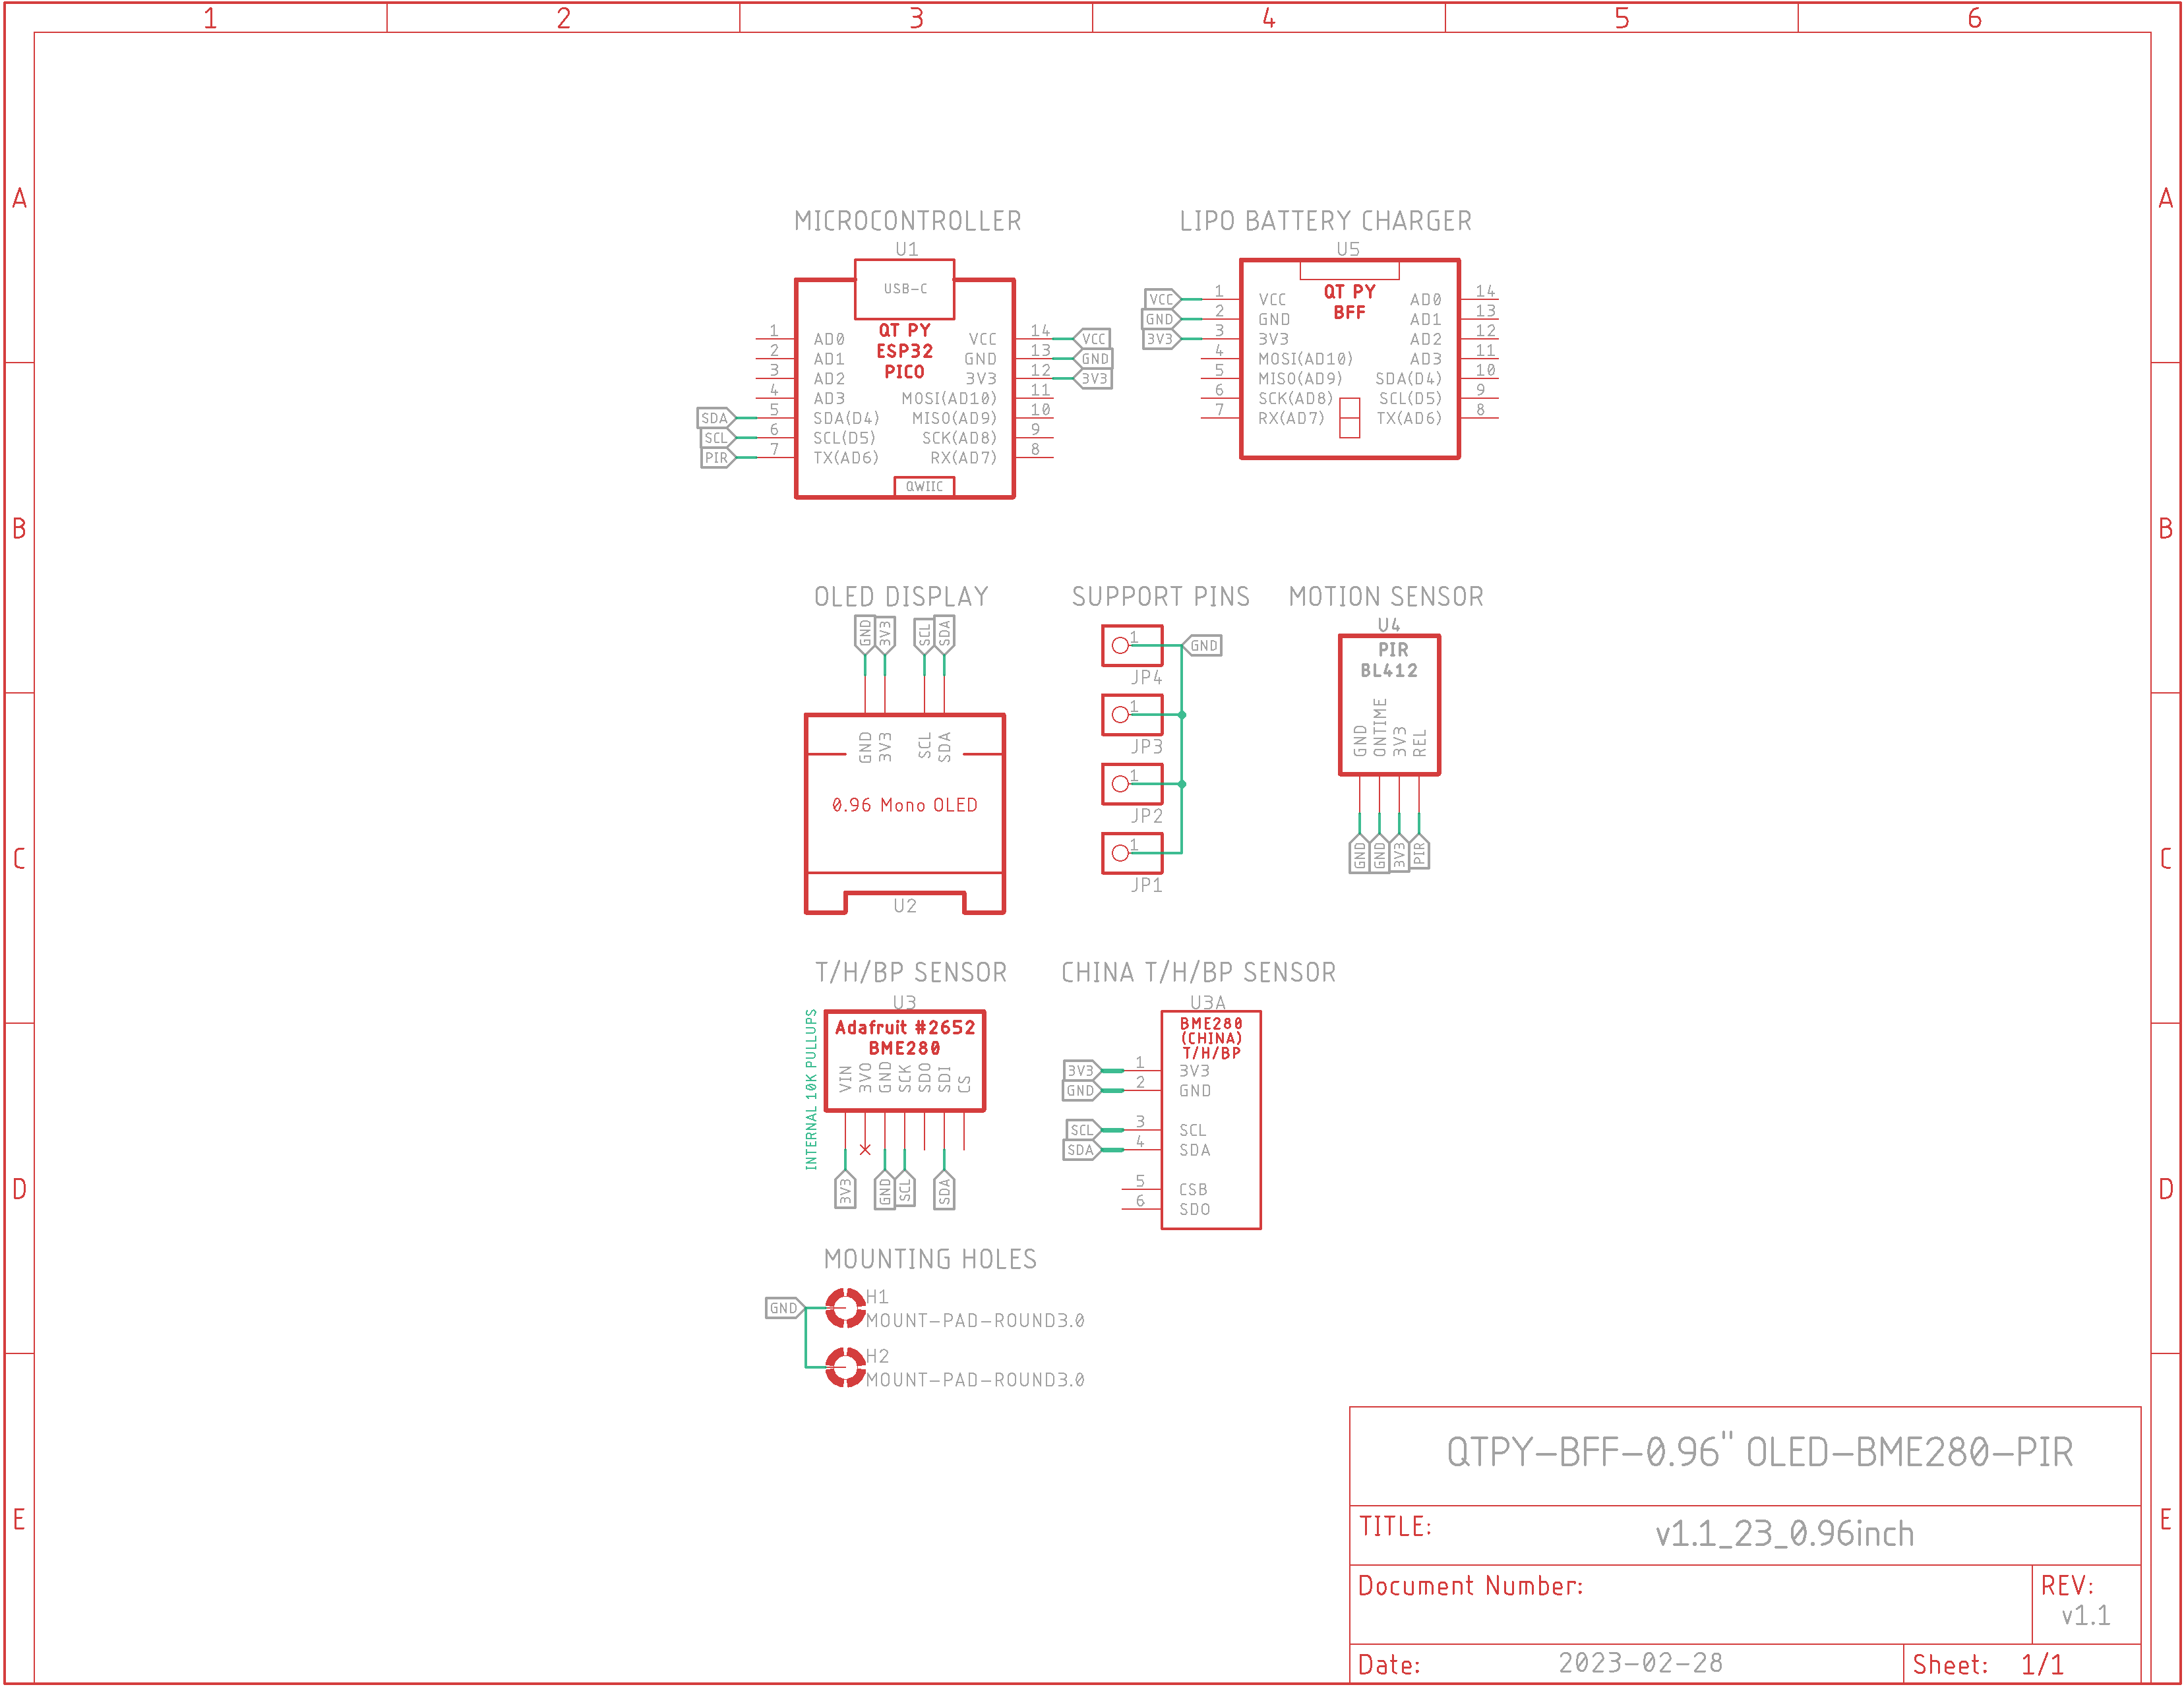
Eagle CAD: v1.1 Schematic
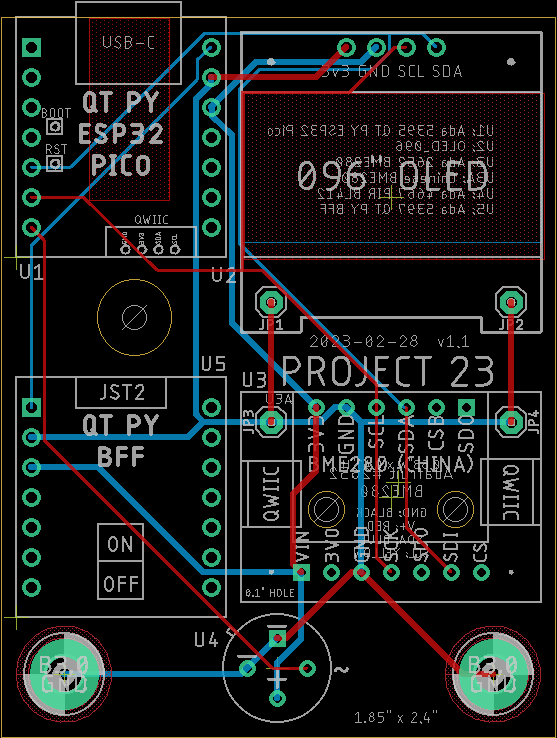
Eagle CAD: v1.1 Board Layout
Eagle CAD: v1.1 Bill of Materials
Devices: Adafruit QT PY ESP32 microcontroller Adafruit QT PY BFF LiPo Charger Adafruit BME-280 T/H/BP Sensor AliExpress BME280 T/H/BP Sensor Adafruit PIR Motion Sensor Banggood 0.96" 128x64 OLED Display
|
Description: Microcontroller based weather reporting: temperature, humidity and barometric pressure.
Features: - 3.3v operation with LiPo battery backup - Adafruit QT PY ESP32 Pico has built-in WiFi and BLE. We don't use those comm abilities in this design but you could get lots of ideas from the Adafruit Learn site on how to do it - 3.7v LiPo battery charges via QT PY BFF and powers QT PY microcontroller, temp sensor, etc. Note that any Adafruit QT Py (Stemma, RP2040, Pico, etc.) can be used in the design.
Software: What you will need to make this work: - Test_Project_23_0.96-OLED.ino This is the code to upload to the Pico - Arduino configuration software from Adafruit for the QT PY ESP32 Pico. Follow the Primary Guide and skip ahead to the Arduino IDE Setup page to install the Windows driver and follow all of the directions on the web page - RTClib for the software real-time clock. We did not waste PCB space on a hardware clock - Adafruit Unified Sensor Driver library from Adafruit. Drop it into ..\Arduino\libraries - U8G2 library for monochrome displays, version 2. You would be better off finding these within the Arduino app using Sketch | Include Library | Manage Libraries | U8G2 and clicking Install on both U8g2 and U8g2_for_Adafruit_GFX
Background Info: The Arduino Test_Project_23_0.96-OLED.ino sketch I wrote is borrowed from some of my larger Aduino projects that included a tiny tone generator, 3-colour RGB LED, 4-character 7-segment LED matrix, microSD drive, etc. You may see a lot of commented-out code that you can ignore or choose to use if you wish to modify the basic design.
How It Works: The mono OLED initially displays the Temperature, Humidity and Barometric Pressure in large characters, then switches over to small characters with more detail. Next you will see an arrow advancing through the three measurements indicating whether they are increasing, decreasing or stable. (I have not perfected the routine yet because I am attempting to use an array of arrays over time of which I have no experience in writing.) After a reasonable viewing time, the display blackens until the PIR motion sensor senses movement and restarts the routine with the latest measurements. |
![]()
Updated 2024-06-05 @ 8am