|
Getting Started (GS): 1
|
|
|
INTRODUCTION The previous sections talk about 1) breadboarding the SBC30 design for testing, and 2) designing the printed circuit board and testing. This section is about writing some of the menu code in 6502 Assembly - W65c02 actually because both the CPU and its instructions have been improved by WDC.
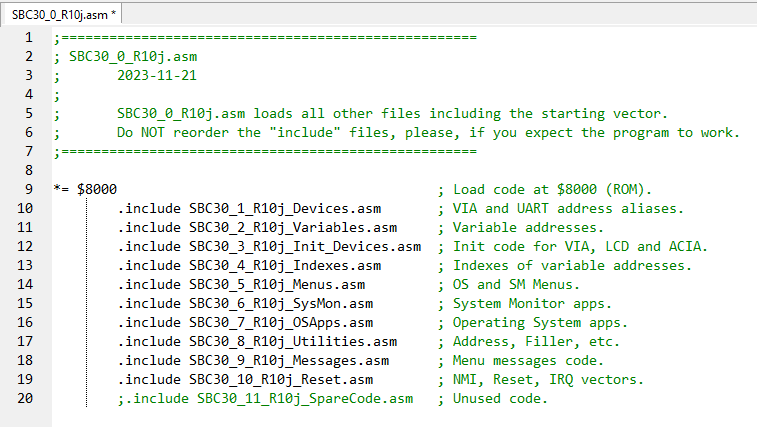
CHOP, CHOP When we started writing 65c02 assembly code for the little SBC30 computer, we found the SBC30.asm file became large and unmanageable fairly quickly. So we chopped the large file into smaller ones and named them based on their function. For the VASM Assembler to work properly, it needs a list of the files and the order in which to assemble them. In the adjacent upper screenshot of the file named SBC30_0_R10j.asm is the list of files and their order in which to be included in the assembly. The files are initially differentiated by the 7th character in the file name. For instance, SBC30_1_R10j_Devices.asm needs to be loaded/included before SBC30_2_R10j_Variables.asm, etc.
File Name Structure A file name structured like SBC30_2_R10j_Variables.asm is hopefully straightforward: - Hardware platform: SBC30 - File assembly number: 2 - Software revision: R10j - File contents: Variables - File type: asm
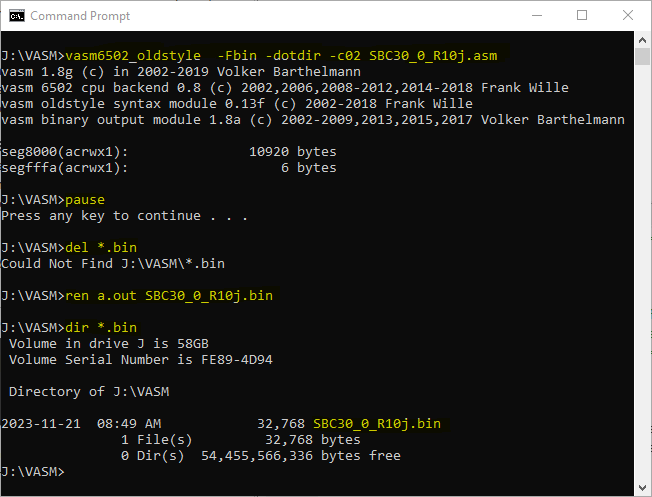
ASSEMBL-EASY Assembling the file suite is easy using "VASM SBC30_0_R10j" as you can see below.
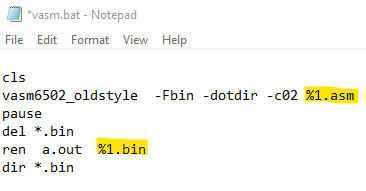
It's "easy" because VASM is actually VASM.bat which contains a few commands to simplify the assembly process. Below you can see the batchfile's content. All you need to do is type vasm and the filename without the .asm extension. Example: VASM SBC30_0_R10j
You can see the results in the lower adjacent screenshot. The batch file commands have been highlighted. Notice that the assembled file is 10920 bytes but the final file is automatically sized to 32768 bytes to fill the 32KB FlashROM.
POP A ROM Once the file assembles without errors, you can pop the flashROM into the MiniPro XGecu TL866 II Plus programmer and the code will be burned into the ROM. Use a good pair of needle nose pliers to bend the ROM's pins ever so slightly to make it easier to insert/remove the ROM from the SBC chip socket because you'll be doing it a lot. (The MiniPro is the ROM "burner" used by Ben Eater in his 6502 videos.) Once the ROM is loaded and reinserted into the SBC30 you need only repower it and hold down the RESET button for a moment to get it to display the menu on your screen and the banner on the LCD panel. (Note: to simplify working with our test file we have left out the code related to the VIA parallel device and the LCD panel. You can still find it in the main file, SBC30_0_R10j.zip
|
|

![]()
Updated 2024-01-15
![]()